2

My blog has moved!

3

You should be automatically redirected in 4 seconds. If not, visit
http://breezybakes.com
and update your bookmarks.

4

Monday, December 30, 2013

Cinnamon Chip Applesauce Cookies

I've been meaning to post the recipe for Cinnamon Chip Applesauce Cookies ever since I posted my Apple Pie A La Mode Cupcakes but I just haven't gotten around to it. The holidays really throw you for a loop. We just got back from Utah last night after driving for 13 hours with two kiddos. And the fun doesn't even stop there. Just when you are so relieved to finally pull up to your house, thinking this day is finally done, you realize, "oh yeah, now I have to unload my car, unpack my clothes and reorganize my entire house to fit all the loot the grandparents gave the kids." Although we could not be more grateful for all those toys and books! But really, I spent five hours working nonstop this morning attempting to put things away and clean my house, and you can't even tell I've done a single thing. Still two bags to unpack!

To top that work off, I got to shove my kids back in the car this afternoon for an hour drive to meet with a pediatric gastroenterologist for Braelyn. You should have seen Braelyn's face when she had to get back in the car today. Haha! She about freaked out and made darn sure "we're staying in Arizona still, right?!"

So, what am I doing right now at 5:00 in the evening instead of touching those two suitcases laying in my bedroom? I'm popping a frozen lasagna in the oven (one I made previously), sitting Braelyn in front of the TV, sticking Emry in the crib for an evening nap, and me...I'm sitting my good old lazy bum right down in front of this computer and pretending like I just pulled these soft warm cookies out of the oven. Yep, sounds good to me.


Cinnamon Chip Applesauce Cookies
 
Ingredients:
1 cup brown sugar
1/2 cup shortening
1 egg
1 cup applesauce (I use unsweetened)
2 cups all purpose flour
1/2 teaspoon salt
1 teaspoon baking soda
1 teaspoon cinnamon
1/2 teaspoon nutmeg
1/4 teaspoon cloves
1 bag Hershey's cinnamon chips (10 oz.) or
 
Alternative mix-ins:
1 cup raisins (soak in applesauce while making batter) and 1 cup chopped pecans or walnuts
2 cups chocolate chips
 
Directions:
1. Preheat the oven to 375 degrees. In a large mixing bowl cream together the brown sugar, shortening and egg.
2. In a separate bowl mix together flour, salt, baking soda, cinnamon, nutmeg and cloves.
3. Add half the applesauce to the sugar mixture until combined. Add half the flour mixture to the wet mixture and mix until combined. Add the last half of the applesauce and mix until combined. Add the last of the flour mixture and mix until just combine.


4. Gently fold in the cinnamon chips. Line baking pans with parchment paper and scoop dough into 1" globs (nice word huh?! They won't form balls, so don't worry about that) and place at least 1" apart.


5. Bake for 11-15 minutes until barely stiff with the touch of a finger and lightly brown. Slide parchment paper with cookies onto cooling racks to cool.

*Makes about 60 cookies


Friday, December 27, 2013

Crescent Dinner Rolls

I have to say, it's been pretty dang nice to be on vacation visiting my family. My mom has been really supportive in trying to figure out some carbolicious type recipes that Braelyn can eat. That's the hard part. Braelyn is a carboholic! That kid would eat bread all day if she could, and now we're telling her that she can't.

Thus far, on the carb side, we've attempted a pancake recipe that was semi-successful at the beginning but turned out to be more like "blobcakes" by the end. Word of advice, always grease the pan in between rounds of pancakes. Otherwise those little gluten free boogers will not lift off the skillet in one piece! Today Braelyn and I came home to a delightfully thoughtful treat of banana muffins that my mom had made. Those turned out to be quite moist and delicious.

So while on my quest to continue to find bread-like recipes for Braelyn, I guess I'll just have to purge out all of my fantastic bread recipes for you all to enjoy. If you can't have 'em, share 'em! Right?! And staying true to the holiday spirit, these buttery babies are present at almost all of our seasonal family gatherings. I like to enjoy these rolls warm, right out of the oven, one section at a time. Yum!


 Crescent Dinner Rolls
 
Ingredients:
1 tablespoon active dry yeast
1 1/2 cups lukewarm water
2 eggs, beaten
1/2 cup (1 stick) melted butter, I always use salted in all my recipes
5 cups all purpose flour
1/3 cup sugar
1 1/4 teaspoon salt
1/4 cup plus 1 tablespoon instant nonfat dry milk
3 tablespoons butter softened
 
Directions:
1. In a large bowl, dissolve yeast in lukewarm water for 10 minutes. Blend in eggs and melted butter.


2. In a separate bowl, mix together flour, sugar, salt and dry milk. Add the dry mix to the wet mixture and blend well. Add additional flour to make a slightly sticky dough. It should still slightly stick to your fingers. Knead or mix for 5 minutes until dough is smooth.


3. Cover the bowl of dough with a damp towel and let rise in a warm place until doubled in size, about 1 hour.


4. Punch down dough. Lightly flour your work surface. Divide dough in thirds and allow to rest for 10 minutes.


5. Lightly flour tops of dough and roll out each section of dough into 12" circles.


6. Brush each circle with 1 tablespoon soft butter. Cut each circle into 10 pie-shaped wedges using a pizza cutter. (Yes I know there are only 8 sections in the picture, but these rolls were a little oversized)


7. Roll up each wedge starting from the wide section all the way to the point. Place point side down on lightly greased baking sheets at least 1" apart. Cover with greased plastic wrap and let rise again until doubled in size, about 45-60 minutes.


8. Preheat oven to 350 degrees and bake 15-17 minutes until golden brown. You can lay foil over the top of the rolls the last 5 minutes if the tops are getting too brown. Remove from the oven and brush tops with melted butter. (If you do not have a brush, take a stick of cold butter and run across the tops of the warm rolls)

*Makes 30 rolls


These are so delicious and freeze really well. Fill your bellies with half the batch. Then shove the other half in the freezer for a day you want to impress somebody, making them think you slaved away all day in the kitchen. Just warm them in the oven a little before delivery. It's our little secret!


Tuesday, December 24, 2013

Cinnamon Roll Chex Mix

Merry Christmas Eve! I can't even believe the time has already come to stay up late wrapping gifts and cursing my husband for his "not so handyman" skills. In fact, Ben is downstairs as I write attempting to piece together a tricycle for Emry. We'll see how that one goes. It's a good thing that toddlers are known to love boxes because that may be all that is intact to give her Christmas morning. Thank goodness none of Braelyn's gifts require any assembly.

Speaking of Braelyn, I have been feeling a little sad for her this year, having just found out about her Celiac diagnosis. With all the Christmas goodies my parents have been receiving from neighbors, she has only been able to taste a handful. She hasn't even been able to eat the special pancake and cinnamon roll breakfasts we've been making in the mornings. Thank goodness for Chex! Those cereals are a lifesaver!

Tonight we are going to our traditional Christmas Eve celebration with Ben's family. There is bound to be a delicious feast and goodies galore. I really wanted Braelyn to be able to eat something yummy that was also exciting and new, not just another piece of plain old milk chocolate or a leftover Halloween sucker tucked away in the back of my parent's pantry. Wait...Chex? Cinnamon rolls? Didn't I just mention those? How about a Cinnamon Roll Chex Mix?!

 
One word of warning: this stuff is extremely addictive! It has a cinnamon caramel crunch, candy coated pecans, soft plump raisins and a smooth cinnamon spiced white chocolate drizzle. This treat would be wonderful to give to neighbors. It stores nicely for up to five days in an air tight container...haha, as if it will even last that long!
 
 
Cinnamon Roll Chex Mix
 
Ingredients:
2 cups Cinnamon Chex cereal
2 cups Rice Chex cereal
2 cups Corn Chex cereal
1/2 cup butter (1 stick)
3/4 cup brown sugar
1/4 cup light corn syrup
2 teaspoons cinnamon, divided
3/4 cup pecan halves
3/4 cup raisins
1 cup white chocolate chips
1 tablespoon shortening
 
Directions:
1. Preheat oven to 250 degrees. In a large mixing bowl, combine cereals and pecans. In a small saucepan over medium heat, melt butter (cut into tablespoon size pieces), sugar,corn syrup and 1 1/2 teaspoons of the cinnamon. Continue stirring until mixture begins to boil. Remove from heat and pour over cereal. Stir to completely coat cereal and pecans.


2. Spread cereal mixture in a large shallow baking pan. I lined mine with nonstick foil to prevent sticking and easy clean up. Place pan in oven and bake for one hour, stirring every 15 minutes. Remove from oven, stir in raisins and let cool.


3. While mixture is cooling, combine white chocolate chips and shortening. Microwave for 1 minute. Remove and stir. Microwave in 15 seconds intervals, stirring in between, until chocolate is smooth. Stir in remaining 1/2 teaspoon of cinnamon. For easy drizzling, pour chocolate into a plastic sandwich bag, cut a small hole in one of the corners, and squeeze mixture over the cereal.
 
 
4. Let cereal cool until chocolate is set. Break into pieces and eat by the fistful!


You can always improvise with the cereal you have on hand. If you only have plain flavors of Chex, just add 2 1/2 teaspoons of cinnamon to the corn syrup mixture for enough cinnamon flavor. If you only have the Cinnamon Chex, just reduce the cinnamon to 1 teaspoon for the corn syrup mixture.
 
Isn't this a fun Holiday treat?! Now Braelyn doesn't have to miss out. Bring on the goodies!


Sunday, December 22, 2013

Chicken Pot Em{PIE}nadas

So since I am not a pie fan, I have never really cared to make pie crust. In fact, in the past 10 years I have only attempted to make pie crust one time. It was about a year after Ben and I were married. Apparently there is a science to making a perfect pie crust, and let's just say I was no scientist that day! Since that sad day of tasteless tough pie crust, I have just resorted to buying refrigerated pie dough whenever I was in a dire need to actually make a pie, which was hardly ever. That is until I discovered my love for chicken pot pies. I am a sucker for those!

A perfect pot pie has just the right balance of seasoned chicken, savory veggies and a smooth creamy sauce to pull it all together. Since chicken pot pies quickly became a monthly staple at our house, I began feeling guilty that I was always using the premade pie crusts. I'm not a huge fan when it comes to preservatives. I'd rather make my own ingredients from scratch. Anyway, I decided it was time to make a noteworthy and somewhat healthy pie crust using a blend of all purpose and whole wheat flour. These bad boys turned out with just enough flake and had a crisp buttery taste. Success!


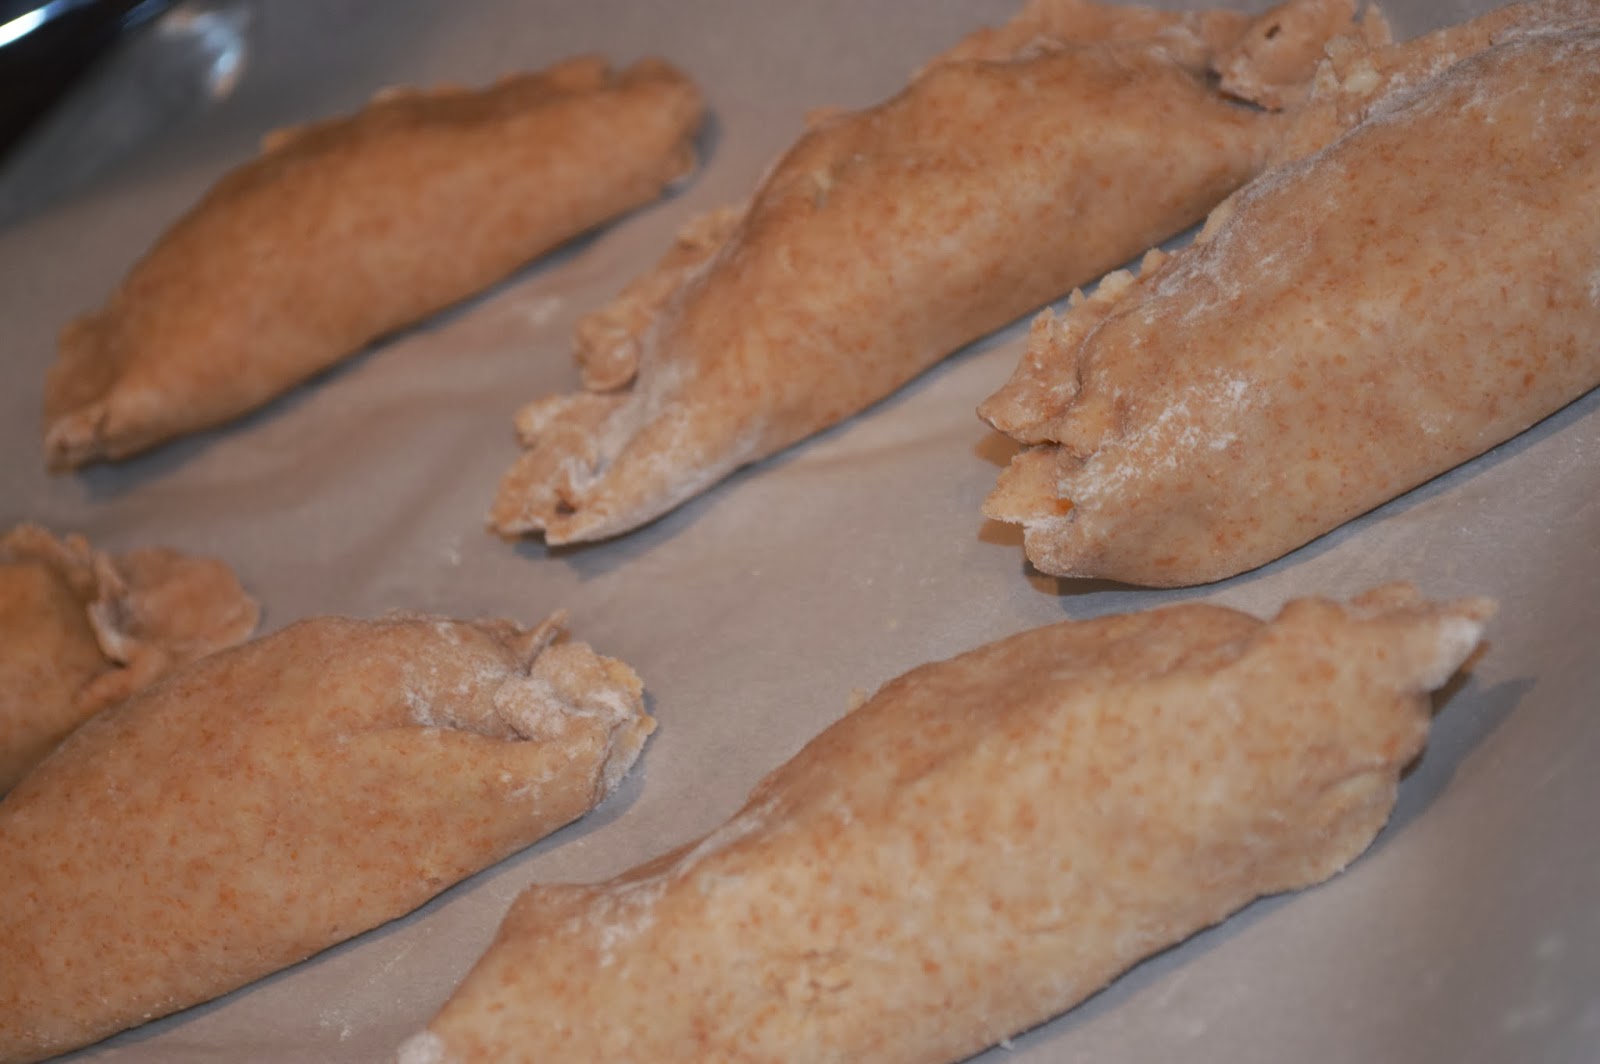
Oh, and did I mention that I like to keep things fun and interesting around here, especially when I am wanting my children to be excited about eating different foods. Instead of your traditional family style pot pie, or even individual ramekin pot pies, I decided to make handheld Chicken Pot Em{PIE}nadas by scooping the filling into the center of rolled out dough, folding them over and baking them on parchment paper. They turned out quite cute and Braelyn loved being able to pick them up and bite right into them. Feel free to make these pies the traditional "crust on top" way as well.


Chicken Pot Em{PIE}nadas
 
Ingredients for filling:
1 large chicken breast, cooked and shredded (my preference of cooking explained below)
2 large or three small/medium sized potatoes
1 cup frozen vegetable mix (corn, green beans, peas and carrots)
1 tablespoon butter
2 tablespoons flour
1 clove garlic, minced
1 cup milk
1 teaspoon rosemary, finely chopped
1/4 teaspoon dried thyme
1/4 teaspoon pepper
1 teaspoon salt
1 teaspoon chicken bouillon
1/4 cup sour cream
 
Ingredients for pie crust:
3/4 cup all purpose flour
1/2 cup whole wheat flour
1 stick cold butter
1/2 teaspoon salt
1/2 teaspoon sugar
4-5 tablespoons ice cold water

Directions:
1. In a medium pot, bring 2 quarts of water to a boil. Place potatoes in water. Cover and reduce heat to a low boil for 35-40 minutes or until potatoes are tender when poked with a fork. Drain and set aside.
2. While potatoes are boiling, begin preparing pie crust. In a food processor, blend together both flours, salt and sugar. Slice very cold butter into tablespoon size slices (8 pieces) and add to food processor. Pulse mixture until butter appears to be in bead sized pieces throughout the mixture. Add water 1 tablespoon at a time and pulse mixture until dough begins to come together and is no longer crumbs. However, you do not want the dough to be wet.


3. Using hands carefully press the dough together, making sure it all sticks. Divide dough into six parts and pat into barely flattened discs. Wrap discs in plastic wrap and place on a plate in fridge.
 
 
4. Begin cooking chicken. (You may use any method of cooking for your chicken...boiling, rotisserie, grilled, etc. It should just equal to 1 cup cooked chicken) For my chicken, I pierce both sides with a sharp knife about 7 times on each side. I then rub each side of the chicken with salt, pepper, minced garlic and crushed rosemary (in addition to the ingredients already listed for filling). I then grill the chicken for about 6 minutes on each side until cooked through.


5. While chicken is cooking, cover and microwave vegetables on high in a microwave safe container with 2 tablespoons of water. Drain and set aside. Peel skin off potatoes and dice into 1/2" cubes. Set aside. Shred the chicken and set aside.

6. Begin making your cream sauce. In a medium saucepan on medium heat, melt butter. Add garlic and cook for 30 seconds. Add flour and mix until flour absorbs the butter. Slowly pour in milk. Whisk together vigorously while heating to smooth out lumps. Once lumps are smoothed and sauce begins to thicken, add rosemary, thyme, pepper, salt and chicken bullion. Stir for one minute more until resembling a cream soup consistency. Stir in sour cream and heat through.


7. Gently stir in chicken, vegetables and potatoes. Salt and pepper to taste.


8. Preheat oven to 375 degrees. Remove pie crusts from the fridge. Let sit 10 minutes. Lightly flour your work surface. Place one disc at a time on floured surface. Generously flour the top of the disc. Gently roll out disc about 8" in diameter to a thin crust, about 1/16" thick. If dough begins cracking on the ends. Dip finger in ice water and pinch back together. Place a 1/2 cup scoop of filling into the middle of the circle.


9. Gently fold over the crust and pinch the sides together. Place on a parchment paper lined cookie sheet. Repeat with remaining pie crusts, remembering to reflour your work surface.


10. Bake at 375 degrees for 20 minutes. Flip pastries and bake an additional 20 minutes. Flip one more time and bake additional 5 minutes, making sure both sides are lightly browned and crisp. Immediately remove and place on cooling racks. Let stand 5-10 minutes.


11. Break one open, smell the savory aroma of the steam and relish each flaky, buttery bite.

*Serves 6

 
Many of these steps can be prepared ahead or even omitted. Pie dough can be refrigerated for up to three days in advance. You can always use leftover chicken or potatoes. You can even use canned new potatoes if you prefer. Adjust any steps or ingredients to your own time constraints or preferences.


Friday, December 20, 2013

Easy Peasy Corn Bread Muffins

On the road again, on the road again! That song has been playing in my head for far too long. Today was the second day of our annual Christmas road trip up to Utah. Oh boy do I love road tripping. The chorus of whining coming from the back seat, the blaring background noise of whatever obnoxious kid's movie that is playing on the IPad, the occasional police siren that makes your heart stop and your eyes jump to the speedometer...yes, road tripping is a blast. Can you sense my sarcasm?

To add to the already tense environment of being stuck in a car for 13 hours with two young children, we got a not so cheery call from Braelyn's pediatrician. You see, she has been having a continuous ongoing stomachache for the past 5 weeks. We finally got some blood work done. Well, the results are in and are life changing. The doctor's diagnosis? Celiac.

A deer in headlights. That's how I felt. My poor sweet girl has been suffering with stomachaches, all the while I'm stuffing her with quesadillas, PB&J's, cupcakes, cookies...you name it...just making everything worse. I felt so awful and confused at the same time. How am I going to alter my cooking to meet her needs? It's not fair for her to miss out, so our entire family's diet will need to change. All these thoughts going through my head. Why can't life just be easy?

Well sometimes it can! And that's what this post is for. Today is dedicated to some things just being EASY. These light and delicate cornbread muffins are so easy. I love the added texture that the canned corn adds. Feel free to leave that out if you want to go even easier. It's your call. Or add jalapenos and cheddar jack cheese for an extra kick. Do whatever you want, just as long as it's EASY.


Easy Peasy Cornbread Muffins
 
Ingredients:
1 cup all purpose flour
1/4 cup plus 1 tablespoon sugar
4 teaspoons baking powder
3/4 teaspoon salt
1 cup cornmeal
2 eggs
1 cup milk (2% or higher fat)
1/4 cup plus 1 tablespoon cooking oil
1/2 cup canned sweet corn
 
 Directions:
1. Preheat oven to 400 degrees. Line muffin tins with paper liners. In a large mixing bowl beat eggs with a whisk. Add milk and oil and blend until combined.
2. In a separate bowl whisk together flour, sugar, baking powder, salt and cornmeal.
3. Add dry ingredient mixture to wet ingredient mixture. Add in canned corn. Lightly mix together with spatula or wooden spoon until just combined. Do not over mix.
4. Fill muffin liners 2/3 way full. Bake at 400 degrees for 14-16 minutes or until tops bounce back with touch of a finger. Cool on wire cooling racks.
 
*Makes 12 muffins
 

These cornbread muffins are so delicious served warm with a touch of butter and honey. Talk about comfort...comfort and easy, that's what I need right now.

 
These muffins pair wonderfully with my Pork Chile Verde.